Gemini CLI Installation Steps
Google AI Coding Assistant Installation Guide
| Resource | URL |
|---|---|
| Official docs | geminicli.com/docs |
📋 Prerequisites
Complete the Node.js installation first and make sure Node.js 18+ is properly installed.
🚀 Gemini CLI Quick Start
Google's AI coding assistant, powered by Gemini 2.5 Pro
1️⃣ Install the CLI 2️⃣ Configure the API Key 3️⃣ Start coding
🚀 Quick Setup with CC-Switch (Recommended)
⚠️ Prerequisite
Before configuring Gemini CLI with CC-Switch, make sure the Gemini CLI is globally installed via npm:
npm install -g @google/gemini-cliVerify the installation: gemini --version
We recommend using the CC-Switch quick configuration tool for a GUI-based setup so you don't have to create configuration files by hand.
Configuration Steps
1. Launch CC-Switch and switch to the Gemini tab
- Open the CC-Switch app
- Click the Gemini tab at the top
- Click the orange + button in the upper-right to add a new configuration
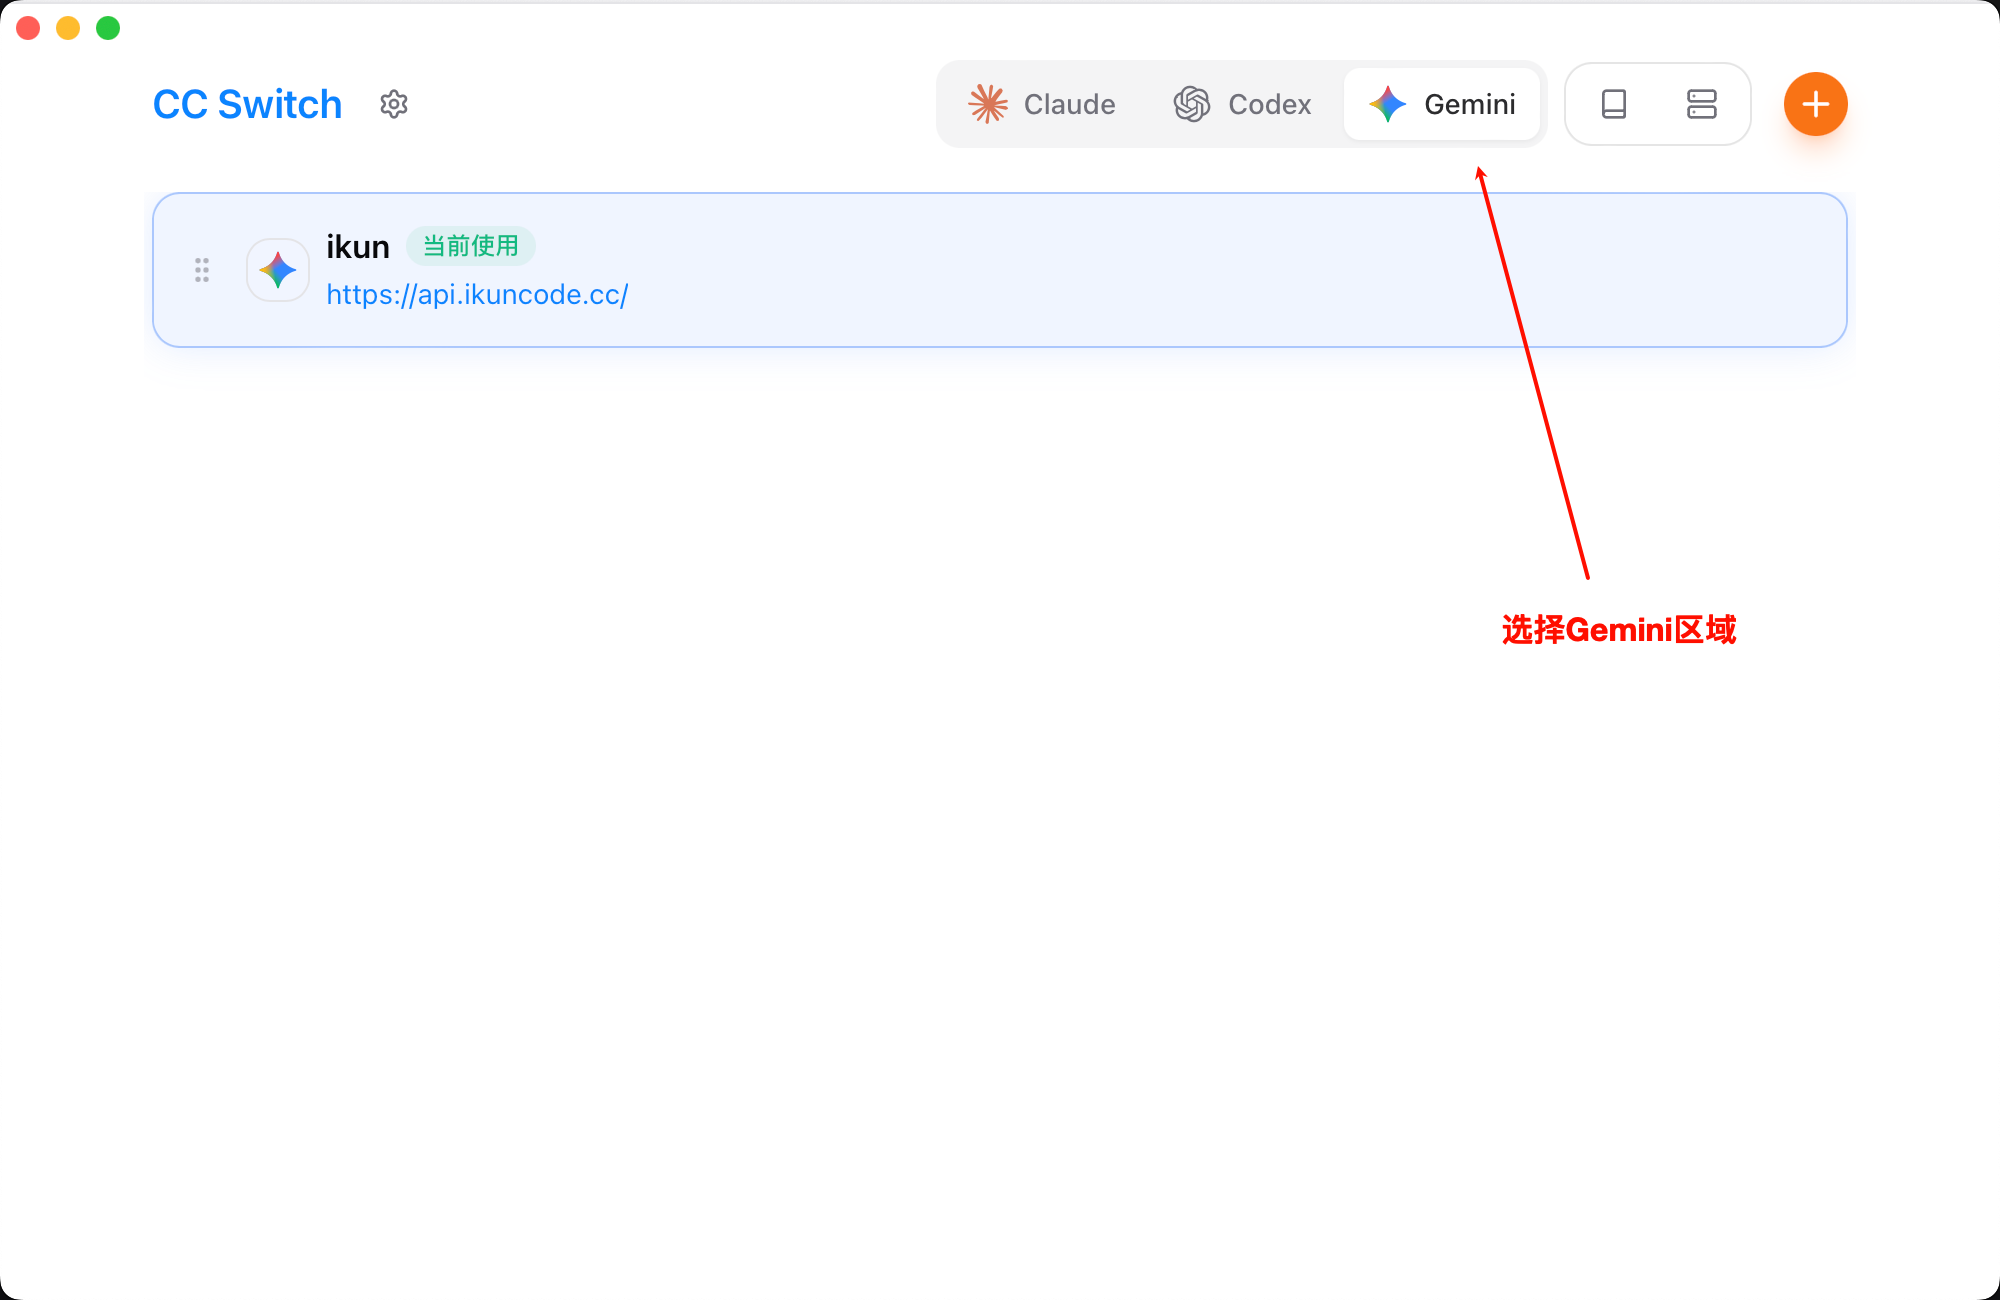
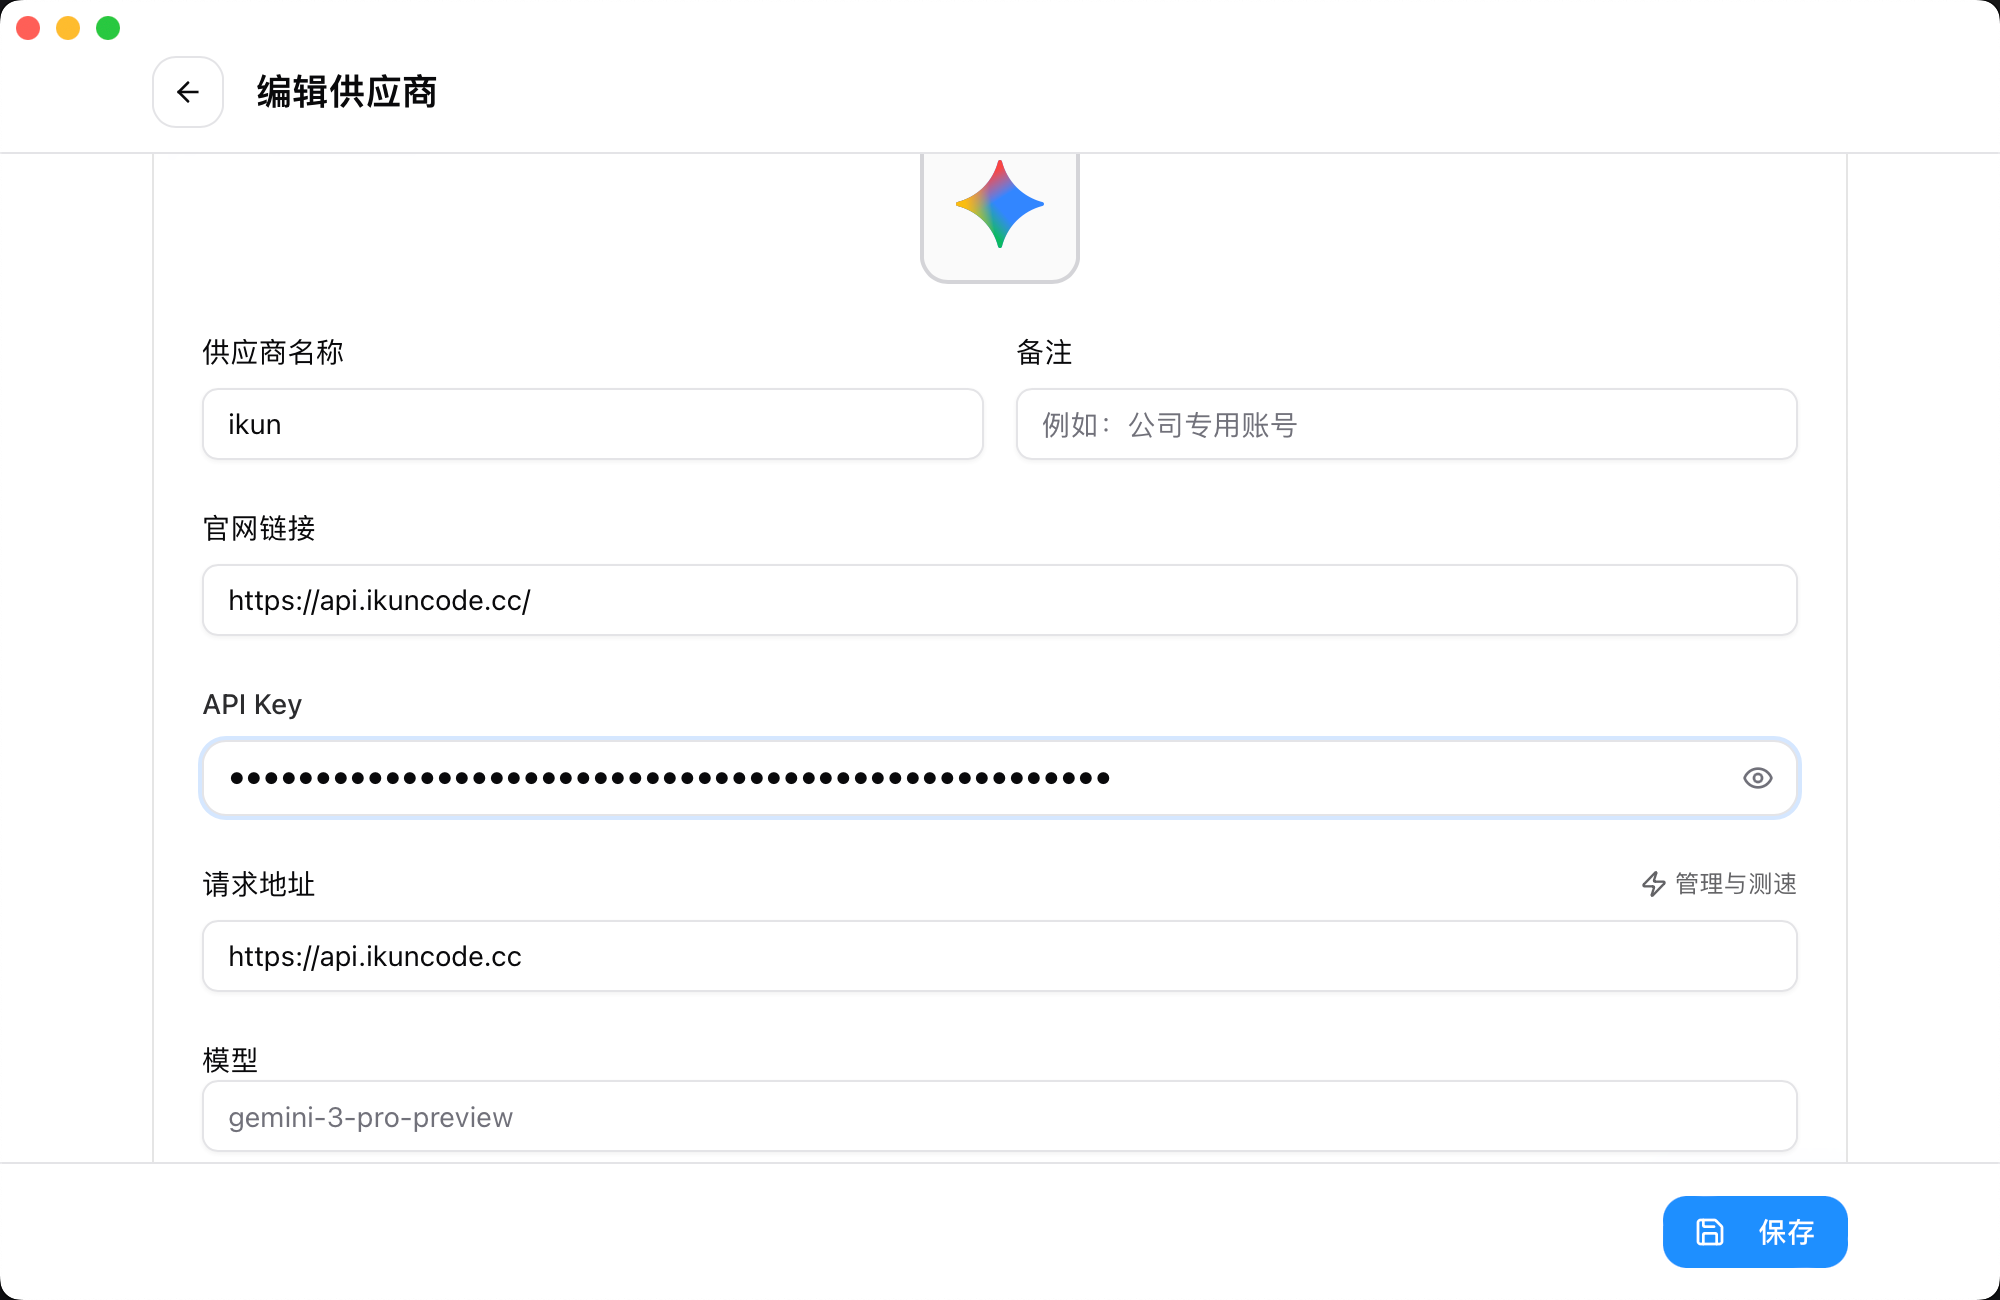
2. Fill in the Gemini CLI provider configuration
- Provider name: any name you like (e.g. "promptia")
- Base URL: enter
https://promptia.cc - API Key: paste the Gemini-specific API Key you obtained from the Promptia platform
- Model: select
gemini-3-pro-previewor another available model - Safety settings: adjust as needed (optional)
- Click Save
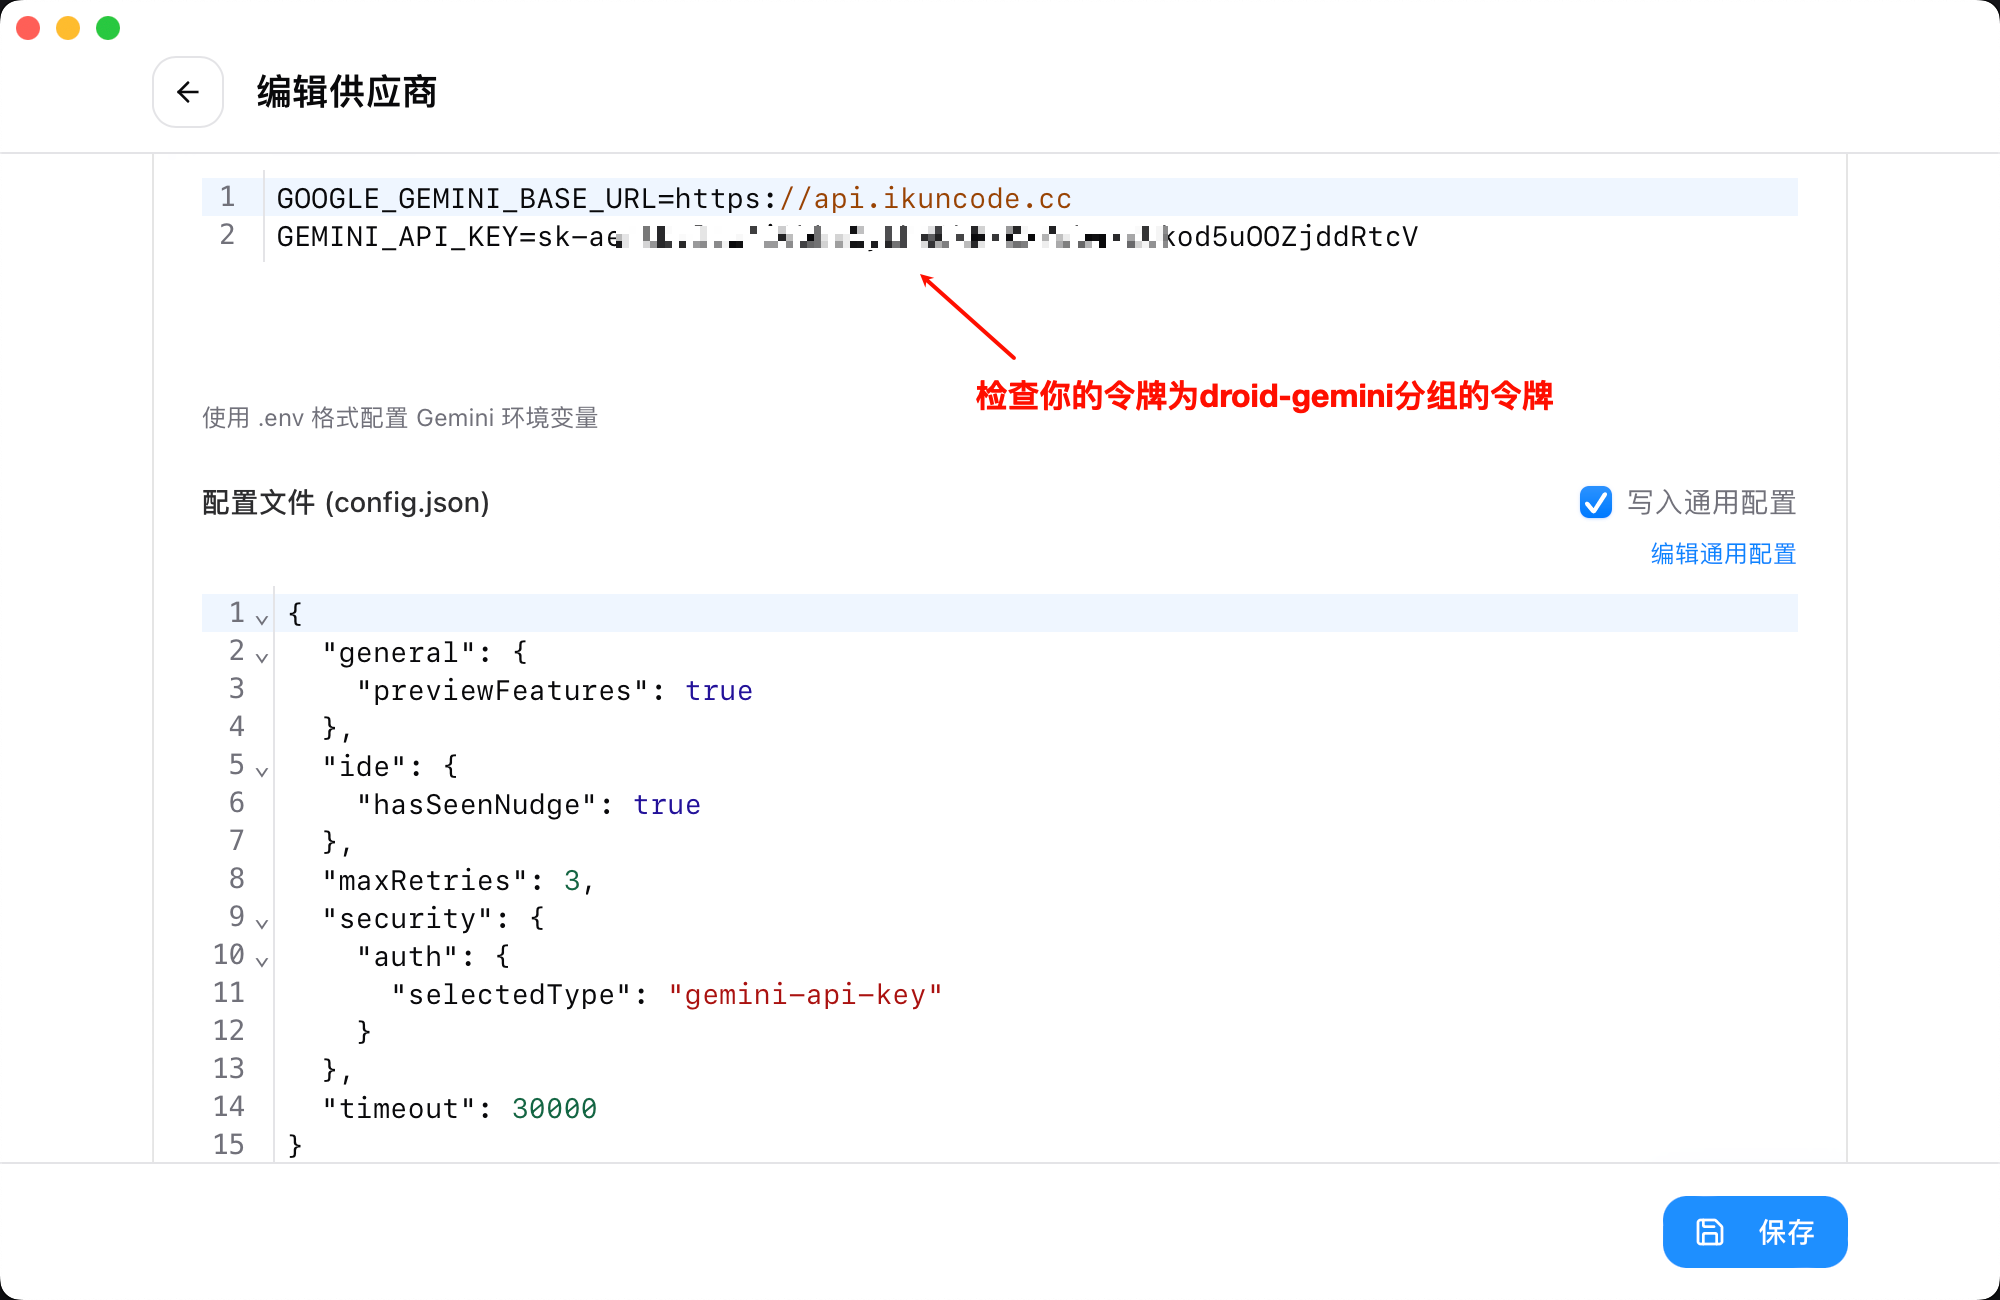
💡 Tips
- CC-Switch automatically creates
~/.gemini/.envandsettings.json - You can add multiple provider configurations and switch at any time
- After switching, close and reopen Gemini CLI for the change to take effect
3. Activate the configuration
- Find the promptia entry you just created in the configuration list
- Click the Use button to the right of the entry
- The configuration is marked as Active (green badge)
- Restart Gemini CLI and the new configuration takes effect
4. Quick switching from the system tray
CC-Switch supports quick switching of Gemini CLI configurations from the system tray:
- Right-click the CC-Switch icon in the system tray
- Select the Gemini category in the menu
- Pick the configuration you want
- The switch takes effect immediately, no need to open the main window
⚠️ Notes
- Make sure to create a Gemini CLI-specific API Key on the Promptia platform
- Gemini API Keys are not interchangeable with Claude Code/CodeX API Keys
- After switching configurations, restart Gemini CLI for the change to take effect
- You can test API endpoint speed inside CC-Switch
⌨️ Manual Command-Line Setup
If you prefer not to use CC-Switch, follow the steps below to install and configure Gemini CLI manually.
🖥️ Windows Installation Tutorial
1️⃣ Install Gemini CLI globally
npm install -g @google/gemini-cli2️⃣ Configure Gemini CLI
⚠️ Important
Replace the GEMINI_API_KEY below with the Gemini CLI-specific API Key you got from https://promptia.cc!
3.1 Create the gemini folder
In your user directory: %USERPROFILE%\.gemini\
3.2 Create the .env file
Create a new .env file inside the gemini folder:
GOOGLE_GEMINI_BASE_URL=https://promptia.cc
GEMINI_API_KEY=Get your dedicated API Key at https://promptia.cc
GEMINI_MODEL=gemini-3-pro-preview3.3 Create the settings.json file
Create a new settings.json file inside the gemini folder:
{
  "ide": {
    "enabled": true
  },
  "security": {
    "auth": {
      "selectedType": "gemini-api-key"
    }
  }
}3️⃣ Launch Gemini CLI
gemini🎉 Getting started with Gemini CLI
• Enter a context description like "M kikasuna" • Agent Mode for automated coding • Google Search for real-time web search
🍏 macOS Installation Tutorial
1️⃣ Install Gemini CLI globally
npm install -g @google/gemini-cli2️⃣ Configure Gemini CLI
3.1 Create the configuration directory:
mkdir -p ~/.gemini
cd ~/.gemini3.2 Create the .env file:
cat > .env << 'EOF'
GOOGLE_GEMINI_BASE_URL=https://promptia.cc
GEMINI_API_KEY=Get your dedicated API Key at https://promptia.cc
GEMINI_MODEL=gemini-3-pro-preview
EOF3.3 Create the settings.json file:
cat > settings.json << 'EOF'
{
  "ide": {
    "enabled": true
  },
  "security": {
    "auth": {
      "selectedType": "gemini-api-key"
    }
  }
}
EOF3️⃣ Launch Gemini CLI
gemini🐧 Linux Installation Tutorial
1️⃣ Install Gemini CLI globally
sudo npm install -g @google/gemini-cli2️⃣ Configure Gemini CLI
3.1 Create the configuration directory:
mkdir -p ~/.gemini
cd ~/.gemini3.2 Create the .env file:
cat > .env << 'EOF'
GOOGLE_GEMINI_BASE_URL=https://promptia.cc
GEMINI_API_KEY=Get your dedicated API Key at https://promptia.cc
GEMINI_MODEL=gemini-3-pro-preview
EOF3.3 Create the settings.json file:
cat > settings.json << 'EOF'
{
  "ide": {
    "enabled": true
  },
  "security": {
    "auth": {
      "selectedType": "gemini-api-key"
    }
  }
}
EOF3️⃣ Launch Gemini CLI
gemini🎉 Deployment complete!
You can now use Gemini CLI for AI-assisted coding.
FAQ
Where do I get the API Key?
Sign in to the Promptia platform and create a Gemini CLI-specific API Key.
Configuration file location
- Windows:
%USERPROFILE%\.gemini\ - macOS/Linux:
~/.gemini/
More questions
See the FAQ or contact after-sales support.